Wednesday, June 11, 2014

Nick's High School Graduation Party Centerpieces

The theme for Nicks party was "all about Nick." So we served foods and desserts that he loves and decorated with photos and artifacts that capture activities he enjoys, people he loves, places he has visited, etc.  To bring it all together we choose the phrase "These are a few of my favorite things"  The place it was most obvious is in the centerpieces.  My daughter dug up all the photos and we had a crafting day with her and her dear friend Charlene.  It was a fun day and the centerpieces turned out very cute.


I bought the metal pans at the dollar store and filled them with styrofoam I had around the house.  Then I covered the styrofoam with red glass or plastic marbles I had around the house.  I made signs in Power Point with the phrase "These are a few of my favorite things" and Charlene mounted them and attached them to bamboo skewers. If you are interested in using the same design here is an image of it.  The frame is made from free digital paper I found online.  It is sized to fit on 8.5 X 11 inch paper.  Feel free to copy and paste and print.


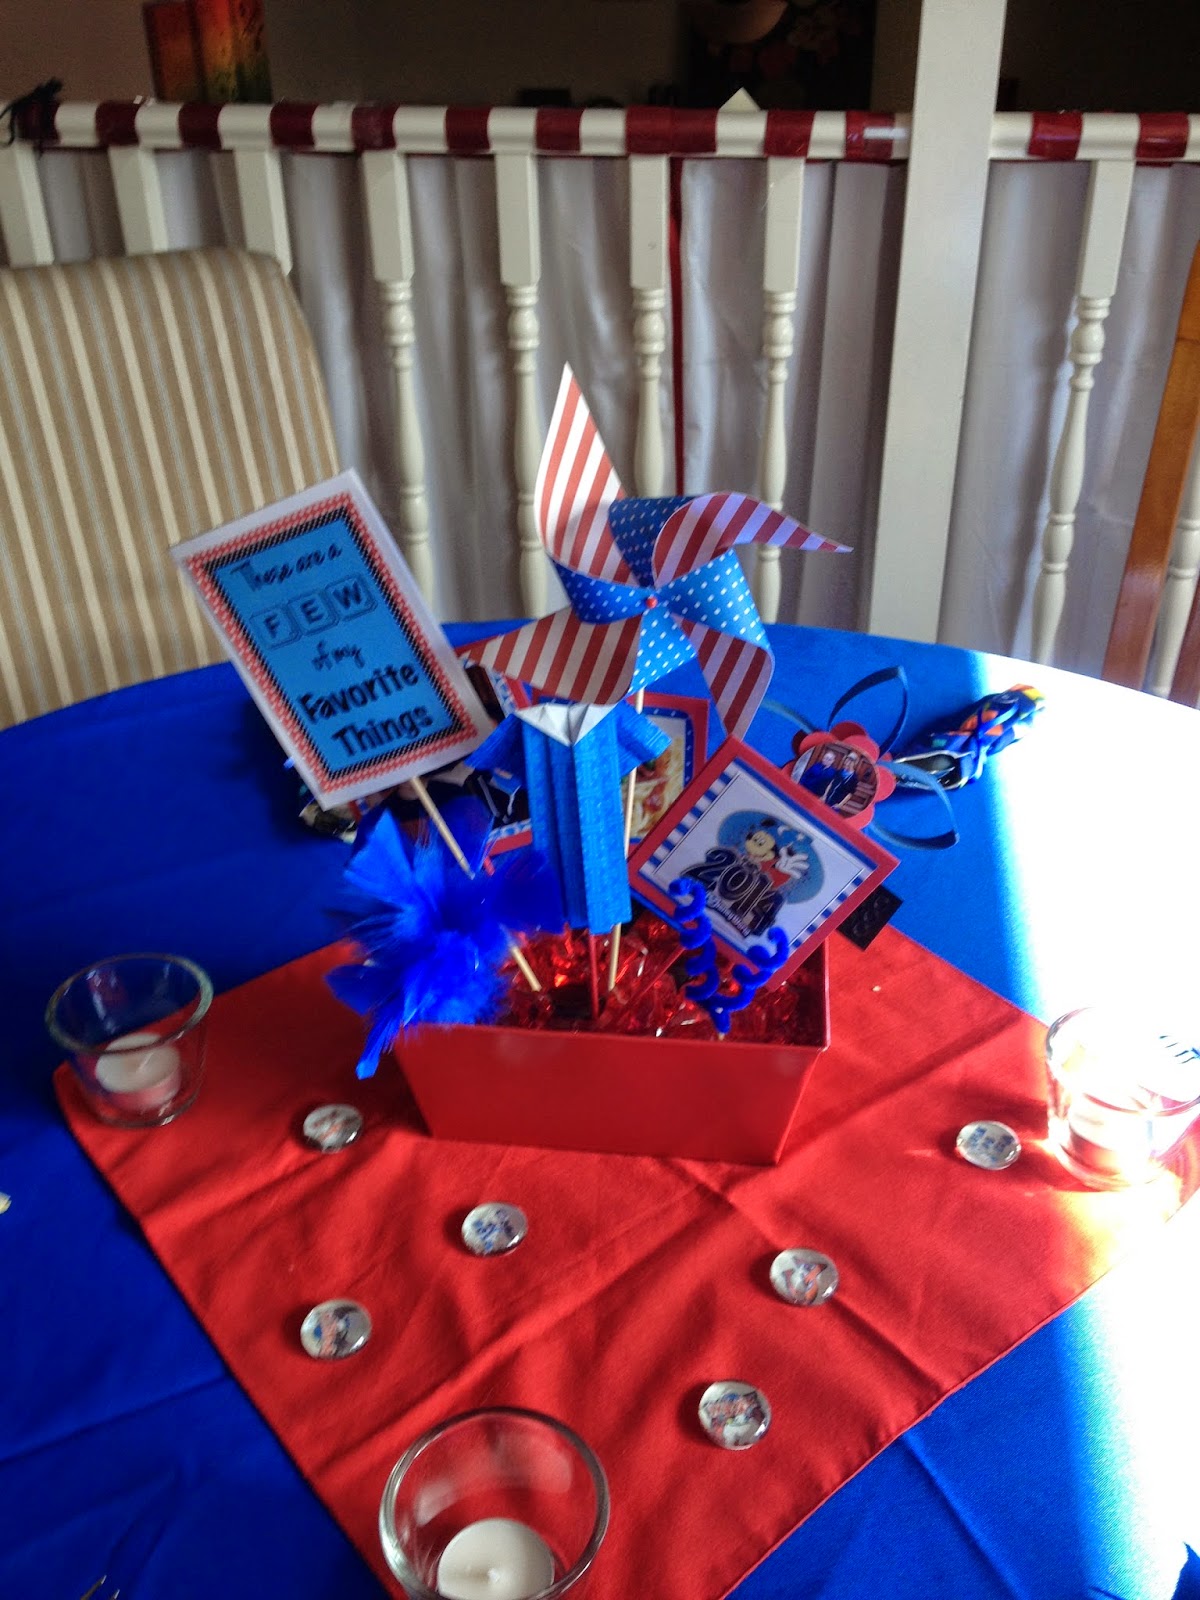
Since the tables were set outside, we added a pinwheel made from the coordinated free digital paper printed on card stock. The pinwheel added another shape and movement to the centerpiece.

Pinwheel made from free printed digital paper
with a different pattern and color on each side 

There are several web sites that give instructions on how to make pin wheels.  I like this one but if you want to check out different ways to make them just search on how to make a pinwheel. They can be made in all kinds of shapes but I wanted the classic shape.

https://www.youtube.com/watch?v=HfYNy5qNGHA

I made mine from a 5 inch square but 4 inch would work just as well and you can easily get 4 from one 8.5x11 inch paper.  I used plastic red beads that I had in my craft room and bamboo skewers.  Bamboo skewers are light weight, low cost and easily purchased at the grocery store but bamboo tends to split when you pierce it so I used a glue gun to secure the pin in place.


Red bead and glue gun glue on the protruding pin point secures the pinwheel


Jen made the flower pictures.  She put photos on both sides so diners could see the photo from each side of the table.


To make the flowers I cut toilet paper tubes into 1/2 inch slices and pinched them to get a pointed petal shape.  Then I painted the inside and outside of the petal with blue poster paint (cheap, easy to clean up and you make any shade by mixing basic colors). Jen glued the painted petals together and added the round punched photos.  I had some red sticks left over from another craft project but you could use the bamboo skewers here too.

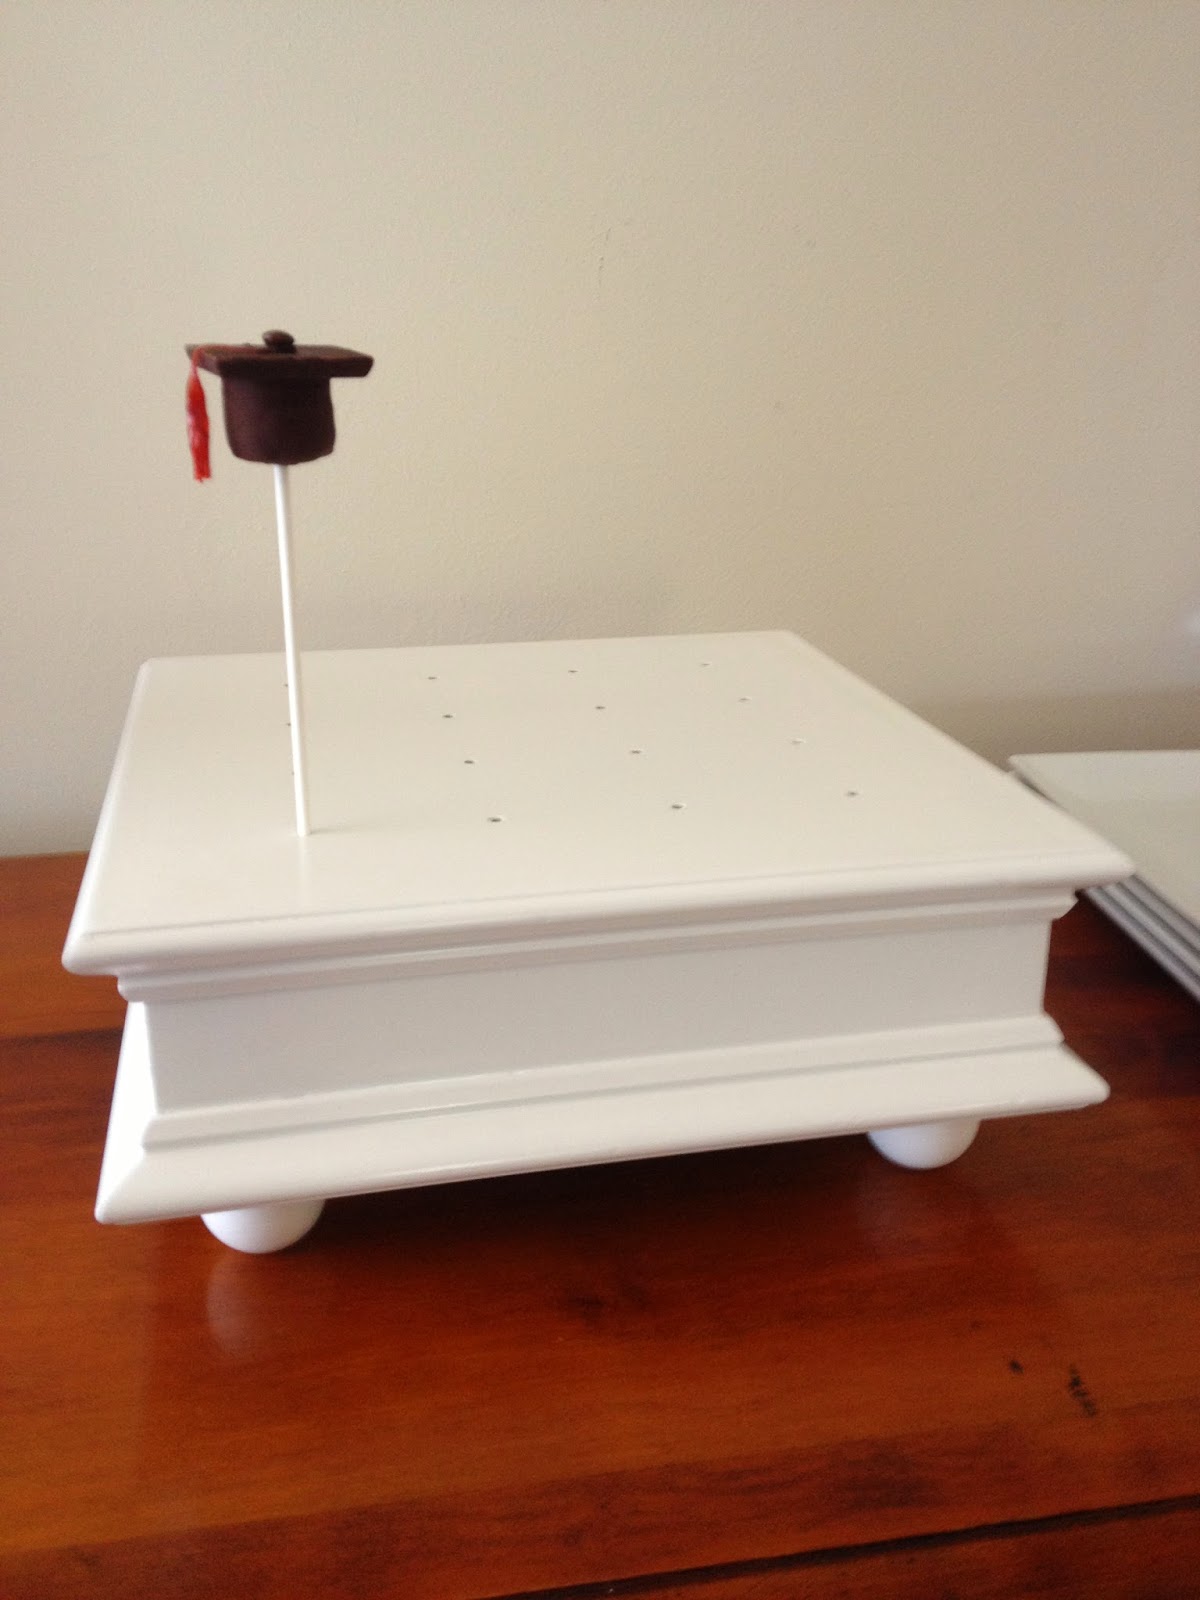
In some of the centerpieces we added graduation gowns made from an origami pattern I found in an origami calendar I had from 2006.  Its a very cute pattern but took some effort because I used the same printed digital paper not origami paper.  Standard printing paper isn't the same weight and flexibility as Origami paper. So, if I had to do it all over again, I would make them from solid color origami paper that matches the color scheme. It looks better if whatever paper you use has a different color on each side of the paper. After I made them I added a skewer inside the gown with a touch of glue to secure it in place.  Here's the directions.


Jenny mounted double sided photos of Nicks favorite things on card stock glued to bamboo skewers.  These photos were between 2 and 4 inches square.

I also added some blue pipe cleaners wrapped in a spiral and attached to a cut skewer and bunches of blue feathers attached to a cut skewer.  These added some texture, color and in the case of the feathers additional movement in the wind. I chose these because I got a big bag of blue feathers for 50 cents and a bag of pipe cleaners for 10 cents at the thrift shop. These and the flower picture provided some contrast to the square and rectangular shapes of the photos and favorite things sign.

Nick has always loved legos and while he doesn't play with them much now, they were a big part of his entertainment as he grew up so we also added some legos to the center piece to give it some different texture as well.

Most of the elements of the centerpiece were photos of favorite books, DS games, characters, CDs, movies, sports or sports equipment, vacation spots, people, hangouts, work and volunteer places, etc.  You can add anything that is small such as ticket stubs from a favorite concert, favorite candy or gum, favorite or current car (in matchbox size). All of these gives guests insight into the graduate and adds interest to the centerpiece.

On each table we added a napkin under the centerpieces and dotted the napkin with glass marbles backed with graduation related images and phrases. Its not easy to see in the photo but I copied the eagles mascot and CV logo from Nick's high school web site, printed them, punched them with a one inch circular punch and glued them to the back of clear glass 1 inch marbles I purchased at the dollar store.  I also printed phrases like "Way to go Nick" and We're so proud of you.  I used wrinkle free clear glue to glue the punched circles to the glass but any glue that dries clear will work.


We added some tea lights in clear glass containers for the evening and a blue table cloth.  I had purchased a number of standard polyester table cloths in royal blue years ago for a shower I was hosting.  They provided a great backdrop for the centerpieces.

Hope this gives you some ideas for your party.  Have fun and be creative!!!


Saturday, June 7, 2014

My favorite graduation party recipes recipes

1. Chocolate Mint Crisps

I have used this Chocolate Mint Crisp recipe many times.  I got it from a Taste of Home recipe book I bought years ago.  They are covered with a melted Andes mint candy giving them a very nice glossy finish and a wonderful chocolate mint smell. I bake these cookies on the shorter side of the suggested range because I like them a bit chewier.  The resulting cookies taste similar to girl scout chocolate mint cookies.

Chocolate Mint Crisps (or in my case "Chews") from Taste of Home
Chocolate Mint Crisp Recipe (yields about 6 dozen cookies)

Ingredients:

1 1/2 cups brown sugar
3/4 cups butter, cubed
2 T plus 1 1/2 teas of water
2 cups (12 ounces of semisweet chocolate chips
2 eggs
2 1/2 cups of all purpose flour
1 1/4 teas of baking soda
1/2 teas salt
3 packages (4.67 ounces each) Andes Mint candies

Directions:

Preheat oven to 350 degrees.

In a heavy saucepan, combine the brown sugar, butter and water.  Cook and stir over low heat until butter is melted and mixture is smooth.  Remove from the heat; stir in chocolate chips until melted.  Let stand for 10 minutes (cooling is a very important step to avoid cooking the eggs prematurely). Pour the chocolate mixture into a mixing bowl and with the mixer on high high-speed, add eggs to the chocolate mixture one at a time, beating well after each addition. In a separate bowl, combine the flour, baking soda and salt; add to chocolate mixture, beating on low until blended. Cover and refrigerate for eight hours or overnight (I typically refrigerate the dough for 2 to 3 hours and it seems to work fine).

Roll the dough into 1 inch balls. Place 3 inches apart on a lightly greased baking sheet. Bake at 350° for 11 to 13 minutes or until edges are set and the tops are puffed and cracked (cookies will become crisp after cooling).  Immediately top each cookie with a mint. Let stand for 1 to 2 minutes; spread over cookie.  Remove to wire racks; let stand until chocolate is set and cookies are cooled.

2. Graduation Hat Recipe (makes 28 grad hat cake pops)

Ingredients:

One dark chocolate brownie mix (I used Ghirardelli Double Chocolate Brownie Mix)
Two bags of Ghiradelli chocolate squares 60% cacao (5.25 ounces each)
1 bag of mini m&ms
1 12 ounce bag of Ghiradelli dark chocolate chips 60% cacao
2 rolls of fruit roll-ups (I needed a red tassel so I used watermelon flavored because the store was sold out of strawberry flavored)

Make your favorite brownie recipe from scratch or use a brownie mix.

Line a 9" x 13" pan with parchment paper as shown below, pour in the batter and bake according to package directions.


With parchment paper larger than the pan it is very easy to lift the brownies out of the pan once they are cooked and cooled.  Don't worry about the ends of the pan that are not covered in parchment.  Just make sure you coat the ends of the pan with non-stick spray so the brownies come out easy.

Once the brownies have baked, let them cool to room temperature and cut with a 3/4" circle cutter to make 28 small cylinders.  I initially tried a 1" biscuit cutter but the resulting cylinder was too large for the Ghiradelli square.  You can get a 3/4" cutter from Ateco Cookie Cutter Set on Amazon.  I use this set a lot so it was worth it for me to buy it.  Push the brownie out of the cutter with your finger or the dull end of a butter knife.  Save and freeze the crumbs left over from the brownies to use for ice cream topping or to make round cake pops later.

I found that if I rinsed with warm water and dried the biscuit cutter every 3-4 cuts, the brownies came out more consistent and more easily because the brownie crumbs did not stick to the sides of the cutter. Once the brownies are cut, proceed just like standard cake pops.  Place the cylindrical brownies on parchment paper on a tray or pan that will fit in your freezer.  Leave the cylindrical brownies in the freezer for 15-20 minutes.

Melt Ghiradelli 60% dark chocolate melts using a double boiler.  While the pops are in the freezer, dip the end of a cake pop stick (purchased at Michael's or Joann's) into the melted chocolate and then gently push it into the center of the top of the cylindrical brownie making sure it is not at an angle. Once you have inserted all the cake pop sticks, freeze the pops for another 10 minutes or so.

While the pops are in the freezer for the second time, remove the paper from the squares in both bags of Ghiradelli dark chocolate (60% cacao) squares.  You should have 28 dark chocolate squares (buy extra if you like to snack - or your husband does!)  Remove the pops from the freezer and dip each pop in melted chocolate tapping the side of the pop stick gently to remove any excess chocolate.  While the chocolate is still wet gently push a dark chocolate square on top of the cylinder with the Ghiradelli logo facing down (hidden from view so the smooth surface of the square is visible on top).  Place the pops square side down on parchment paper to rest until the chocolate is fully hardened.


While the chocolate is hardening, make the tassels.  Unroll a fruit rollup and using a sharp knife, cut a section that measures about 1.5" x "1.5".  Cut that section into three equal subsections that are 0.5" x 1.5". Each subsection will become a tassel. Cut away part of the sides of each subsection to create a shovel shape as shown below.  Use your knife to create a "fringe" by cutting slits in the "blade end of the shovel." Roll the blade end together and press tightly to create the tassel.

Once you have the tassels finished, sort through the bag of mini m&ms and pick out 28 brown mini m&ms. Set aside.

Once the chocolate is hardened and the mortarboard is secured to the cylinder, use a toothpick to dab a small amount of melted chocolate in the center of the mortarboard and push a tassel into the soft chocolate.  Before the chocolate hardens add a mini brown m&m on top of the point where the tassel is attached to serve as the mortarboard button.

Use a damp paper towel to remove any excess chocolate on the cake pop stick. You can set the cake pop on its side in a parchment paper lined tupperware, seal it tightly and refrigerate it for 24-48 hours before serving.

If you don't have a cake pop stand you can use mason jars or glasses.  Fill mason jars or glasses with  decorative sand (you can buy a bag for $1 at the dollar store) and add 3 to 5 pops in each jar (or glass). Add a ribbon bow with the appropriate color scheme.


Friday, June 6, 2014

Nick's High School Graduation Dessert Buffet

Nick's High School Graduation Party

This is my first post of several that I will post over the next week.  Nick graduated last week and then went to Disney World this week (having so much fun).  My daughter and I spent months planning his graduation party and making decorations.  We had so many, I need three posts to cover all of it.  This first post is the dessert table (my favorite part of any party - honestly I could be a "dessertatarian").  I searched Pinterest and other web sites for ideas and created a fairly extensive set of Pins.  I will try to give credit to those sites from which I got ideas but there were so many great ideas I am not sure I will catch all of them.  My apologies in advance to those sites I may have inadvertently missed. Lastly, it is obvious from the photos that the school colors are a light royal blue, red, white and a touch of black.  I used a lot of black and a lighter blue (not navy) to help avoid a "4th of July" look.


I wanted a banner that connect sweets and graduation.  After several ideas I settled on "Sweet Success."  Then I added a mocked up diploma (which I signed myself as the superintendent and Nick thought was funny) and created a mortarboard to put above the banner.


To mock up a diploma, I used a diploma template from Microsoft Word and filled in Nick's name, his school and graduation date and printed it on off white paper.

To make the mortarboard, I covered a 10"x10" piece of black foam core board from the dollar store with black fabric I bought for 25 cents at a thrift shop.  Then I covered a small black button with the same fabric and added a tassel made from embroidery thread (also purchased at a thrift shop for less than a nickel ).


Learn how to make a tassel here.

To make the "Sweet Success" Banner I used MS Power Point to import free blue paper with small white polka dots as a background to black lettering using "Marker Felt" font.


I cropped the letters in a rectangle and mounted them on free red and white striped digital paper on top a black card stock to give it a black border.  I used a glue gun to attach each letter to black yarn to hang the banner.

I had some curtains left from my home decorating red phase so they served as a great backdrop.

To add more interest I used circle garland punched from free digital paper in different blue patterns and Nick's high school logo (which the high school conveniently provided on their website).


There are quite  few blogs out their on making garland like this since it has been popular for quite some time.  Here are some of them:

      The proper pinwheel method

      How to make paper holiday garland at curably.com

      Bonjour Jacqueline glue method

      Juneberry Lane card stock method

I ended up using a combination of a couple of these methods.  Since I wanted all my decorations to match and I wanted a pattern on the circles instead of plain card stock, I used free digital paper and the school logo (CV)  printed on standard white printing paper.  Then I punched the paper using varying sizes of punches. Punches are designed to work best on card stock so when using thinner printer paper the punch works best if you double up the paper so you are punching through two layers at once. I found that if you pre-cut the paper into strips that are slightly larger than the punch you are using, the punching goes much faster.


Use two sheets of paper to make punching easier


I sewed the circles in a repetitive pattern leaving a few stitches of space between each circle.  I found if I kept a constant pull on the thread and counted the stitches between circles I ended up with a fairly consistent spacing. I also lined the circles up in order on my workspace next to my sewing machine.  The sewing went very fast and I had no problems with sewing circles in the wrong order.

The down side of using digital paper printed on standard white paper is that it is white on one side (and trust me the garland will twist once you hang it showing the white paper).  So, once I had sewn the garland to the proper length (5 and 1/2 feet), I laid it flat on my dining room table glued the same pattern/same size circle on the back of each sewn circle.

In the photos below, you can see the stitching one side but not on the side with the glued circles. Once hung, you don't notice the stitching.

Sewn side showing

Glued side showing

I had quite a few circles left over once the garland was done so I created the 2014 sign by gluing the circles on white card stock in a random pattern (I didn't have 11"x17"card stock  and I wanted the sign to be larger than 8" x 11" so I taped two 8" x 11" white card stock together before I glued the circles on.  The circles covered the seam nicely.

I used the same free digital red striped paper and black card stock to create the 2014 numbers, mounted them on the random circle paper and mounted everything on black foam core from the dollar store to create a two inch black border.  I created a template for the numbers by using MS Power Point to print two numbers per page with a landscape orientation.  Then I used black carbon tracing paper to transfer the number shape to the red and white striped paper.  The end result served as the back drop for the cupcake stand.


Now on to the desserts.

There were 6 desserts and three types of candy on the table:

Vacuum Cleaner Cookies (this is one of my favorite recipes and always a crowd pleaser - seriously everyone will ask you for the recipe so be prepared). I made them according to the recipe but then used 1" biscuit cutters to cut them in circles (definitely a circle theme here).  I added a small amount of cream cheese frosting to layer two circles together and a bit of cream cheese frosting on top to hold a raspberry  (brings in the school colors again).


I added Pop Rocks in a glass jar in the back of the vacuum cookies with an accordion folded circle that says "You Rock."

I baked a Chocolate Mint Crisps cookie recipe from a Taste of Home book I bought years ago.  This is one of Nick's favorite cookies and we have made them together several times - if you love chocolate mint girl scout cookies, you will love this recipe.


I added Red Vines in an apothecary jar behind the Mint chocolate cookies.

On the cupcake stand I added Dark Chocolate Chip Cupcakes with Mascarpone Cheese frosting and  Lemon Meringue Cookie Cups from Mom on Time Out (Lemon Meringue Pie is one of Nick's favorite desserts).  I piped 2014 in red colored white chocolate as a decoration on the chocolate cupcakes and CV on the lemon merengue bites.


Jen made lemon cookie (another one of Nick's favorites).  I don't have the recipe but will ask her when she gets back from vacation and publish it with her permission. I'm a symmetry nut to I had a second jars of Red Vines behind the lemon cookies.


Lastly, I made graduation hat cake pops.  These were fun to make and surprisingly easy. There are a number of sites on Pinterest that show grad hats made from Reese's Peanut Butter Cups and chocolate squares but we have peanut allergies in the family so we aways have a no peanut zone.  I also wanted to make cake pops but I am not a huge fan of standard cake pops (from plain cake mixed with frosting) - too sweet and not enough texture for my tastes.  So I made double dark chocolate brownies (dark chocolate cuts the sweetness a bit).  Then rather than shaping the bottom portion of the hat into a cylinder, I cut the brownies with 3/4 inch round cutter found in the Ateco Cookie Cutter Set to get a clean and consistent shape.  I use these cutters all the time and I like the fact that the set comes with a wide range of sizes. Here is the recipe and steps for the Brownie Graduation Hat pops.


I also added a jar of Smarties with an accordion folded circle and a "Smartie Pants" label.


My husband made this cake pop stand similar to one I saw online (I love it).

The last note is that since Jen and I put so much on her buffet, we didn't have space for plates and napkins.  No problem, we cleaned out a drawer, opened it up, added a red napkin to tie into the color scheme and dropped in the plates and napkins.

Next blog covers more decorations and the last blog on this party will cover entertainment.  Enjoy. Sandy